


Think Like A Workfront Admin: Creating Reports Like a Pro | Advanced Views Part 2
Now it’s time to create our Task report. When creating a new report, it is always best practice to create a name and write a description for the report. The name should be descriptive enough to alert the user what the report is and the description should explain what the report shows.
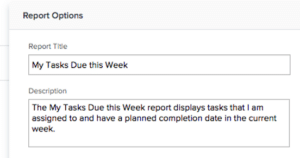
Report Name: My Tasks Due this Week
Report Description: The My Tasks Due this Week report displays tasks that I am assigned to and have a planned completion date in the current week.
Instructions:
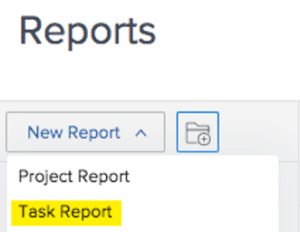
- Navigate to the Reporting area, select “New Report”, and choose the Task report.
- Navigate to the “Report Settings” dropdown and add the Report Title and Description. Select Done, when complete.
- Add the following columns: Project Name, Task Name, Status, Assignments, Planned Start Date, Planned Completion Date, Planned Hours, Actual Hours.
- Select “Add Column” and drag the new column between Planned Completion Date and Planned Hours,
- Confirm the new Column is highlighted blue then select Switch to Text Mode (upper right corner).
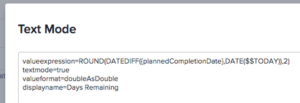
- Set the displayname to “Days Remaining”.
- Create a new line and type: textmode=true
- This action alerts Workfront that we are using custom text mode rather than using standard fields.
- Create a new line for the valueexpression, which will leverage three functions: ROUND, DATEDIFF, and DATE
- Remember to reference the API Explorer for the camel case values for object fields.
- Set the valueexpression to: valueexpression=ROUND(DATEDIFF({plannedCompletionDate},DATE($$TODAY)),2)
- DATE($$TODAY): calculates the date within the parenthesis and we used the $$TODAY wildcard to calculate today’s date.
- DATEDIFF: calculates the number of days between two dates and we used the Planned Completion Date (camel case form) and DATE($$TODAY) dates.
- IMPORTANT: Don’t forget to enclose your Workfront field between curly brackets: {plannedCompletionDate}
- ROUND: rounds the value to the number of decimal places identified, which is 2 in our example.
- Create a new line for the valueformat.
- Set the valueformat to: valueformat=doubleAsDouble
- The valueformat formats the value of the valueexpression in the report when displayed.
- Select “Save”.
- Select “Add Column” and confirm that the column displays after the Actual Hours column.
- Confirm the new Column is highlighted blue then select Switch to Text Mode (upper right corner).
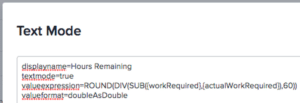
- Set the displayname to “Hours Remaining”.
- Create a new line and type: textmode=true
- Create a new line for the valueexpression, which will leverage three functions: ROUND, DIV, and SUB.
- Set the valueexpression to: valueexpression= valueexpression=ROUND(DIV(SUB({workRequired},{actualWorkRequired}),60))
- SUB({workRequired},{actualWorkRequired): calculates the difference between two fields and we used workRequired (planned hours) and actualWorkRequired (actual hours).
- DIV: divides two numbers and we used SUB({workRequired},{actualWorkRequired}) and 60; We need to divide by 60 because Workfront uses seconds rather than minutes within the SUB function.
- ROUND: rounds the value to the number of decimal places identified, which is 2 in our example.
- Create a new line for the valueformat.
- Set the valueformat to: valueformat=doubleAsDouble
- Select “Save”.


After you have added both custom columns, select “Save + Close”. The report should look similar to the following:

In Part III, I will share the text mode code for a Task report and an Assignment report and introduce the series of blogs in the Create Reports Like a Pro series.